Google Maps SDK for iOS in Xcode Storyboard
Developing a location based application on iOS with Google Maps is super easy with the Google Maps SDK for iOS. So here’s the complete step-by-step way to add a google map to your iOS application using storyboards in Xcode 5.
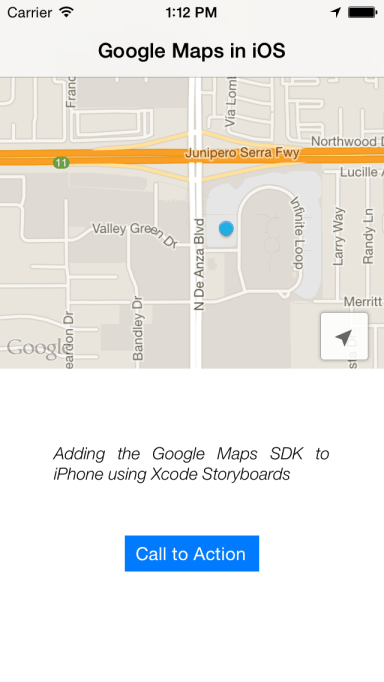
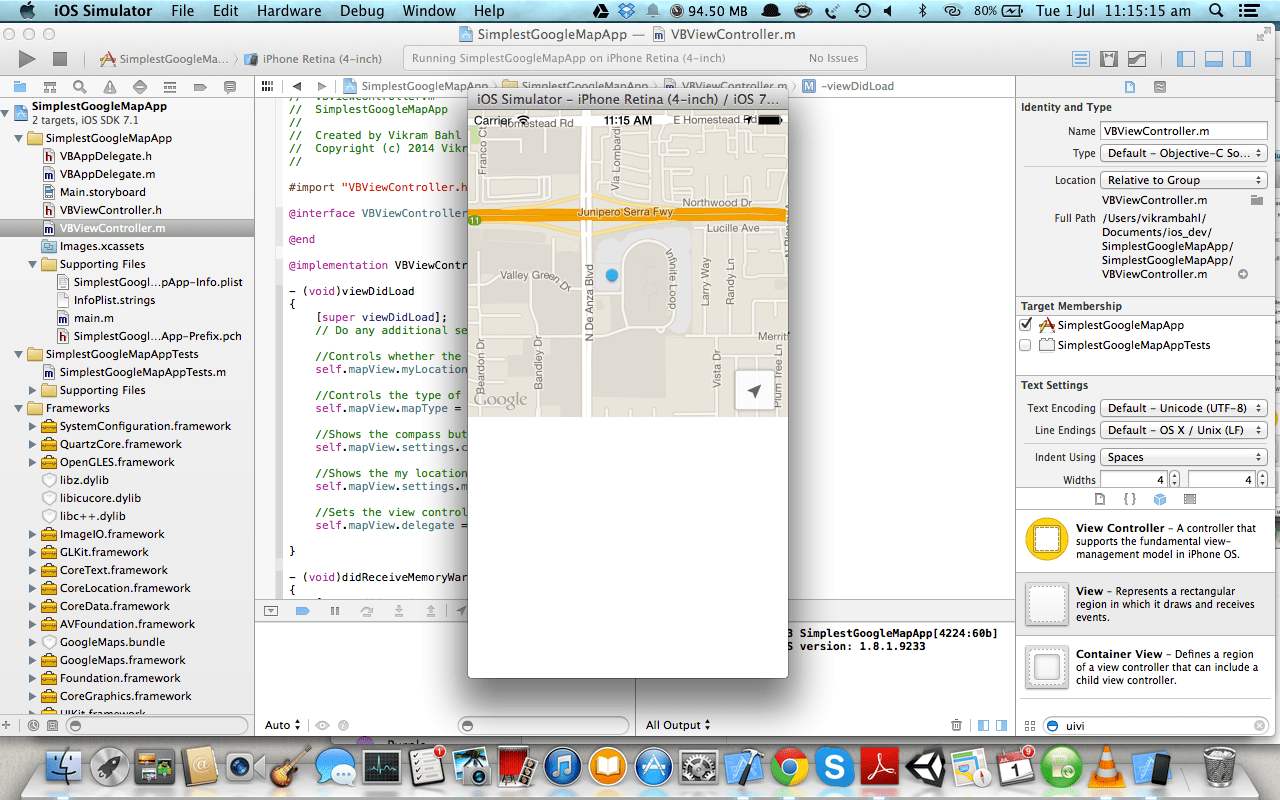
This is what your app will look like in the end:
Download code from Github: https://github.com/svram/GoogleMapSDKiOS-Storyboards
- Download the Google Maps SDK for iOS:
https://developers.google.com/maps/documentation/ios/start#getting_the_google_maps_sdk_for_ios
The current version is 1.8.1
- Obtain an API key from the Google Developers console. Do the easy to follow instructions here:
https://developers.google.com/maps/documentation/ios/start#the_google_maps_api_key
- Setup Xcode Environment to work with Google Maps SDK
a) Open Xcode and Create a new project.
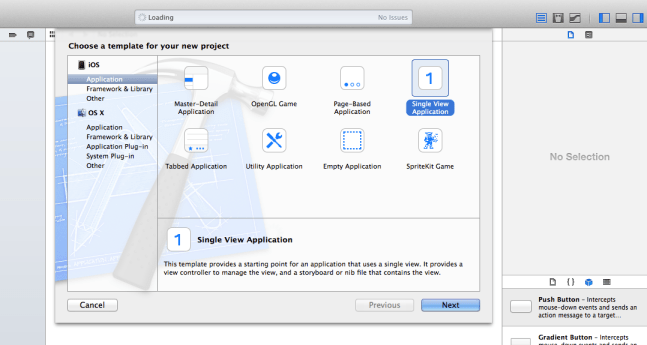
b) Create a new ‘Single View Application’ template.
Create Single View Application in Xcode
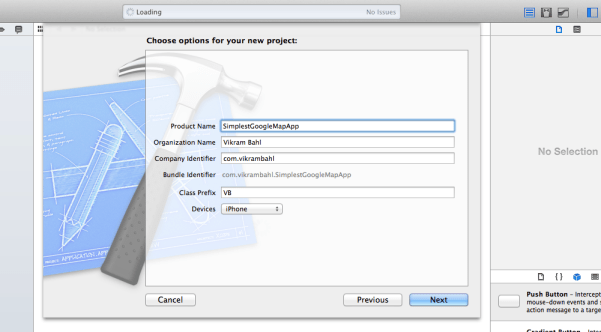
c) Enter Product, Organization & Company names. Enter a class prefix and choose iPhone from the devices drop down menu.
Add product name, company etc
d) Save your project to disk.
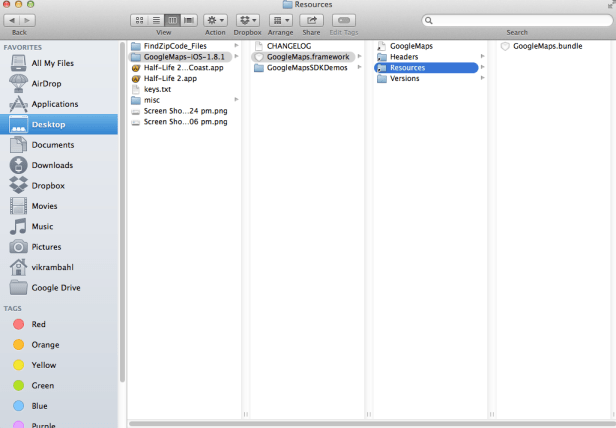
e) Unzip and open the Google Maps iOS SDK that you downloaded in Step 1.
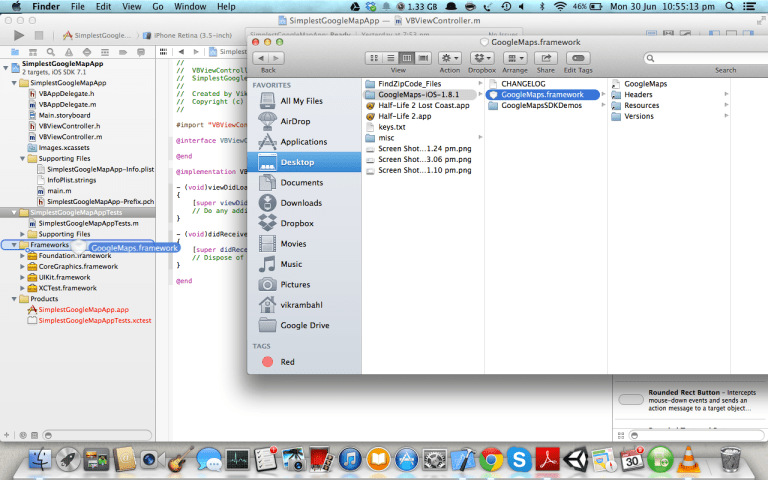
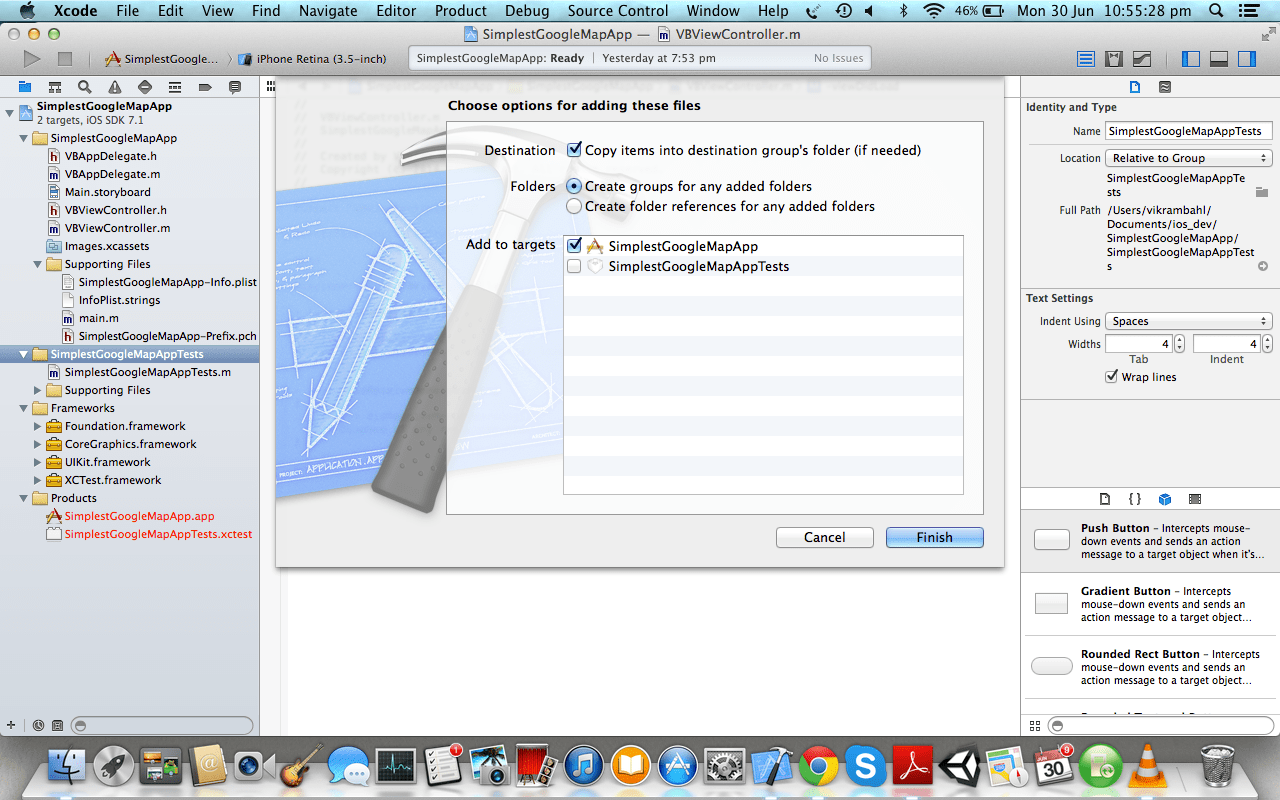
f) Add the “GoogleMaps.framework” bundle to the “Frameworks” Folder in Xcode by dragging it there. When prompted, select “Copy items into destination group’s folder”.
g) Similarly, drag the “GoogleMaps.bundle” from the GoogleMaps.framework -> Resources folder to the “Frameworks” folder in Xcode. When prompted DO NOT select “Copy items into destination group’s folder”.
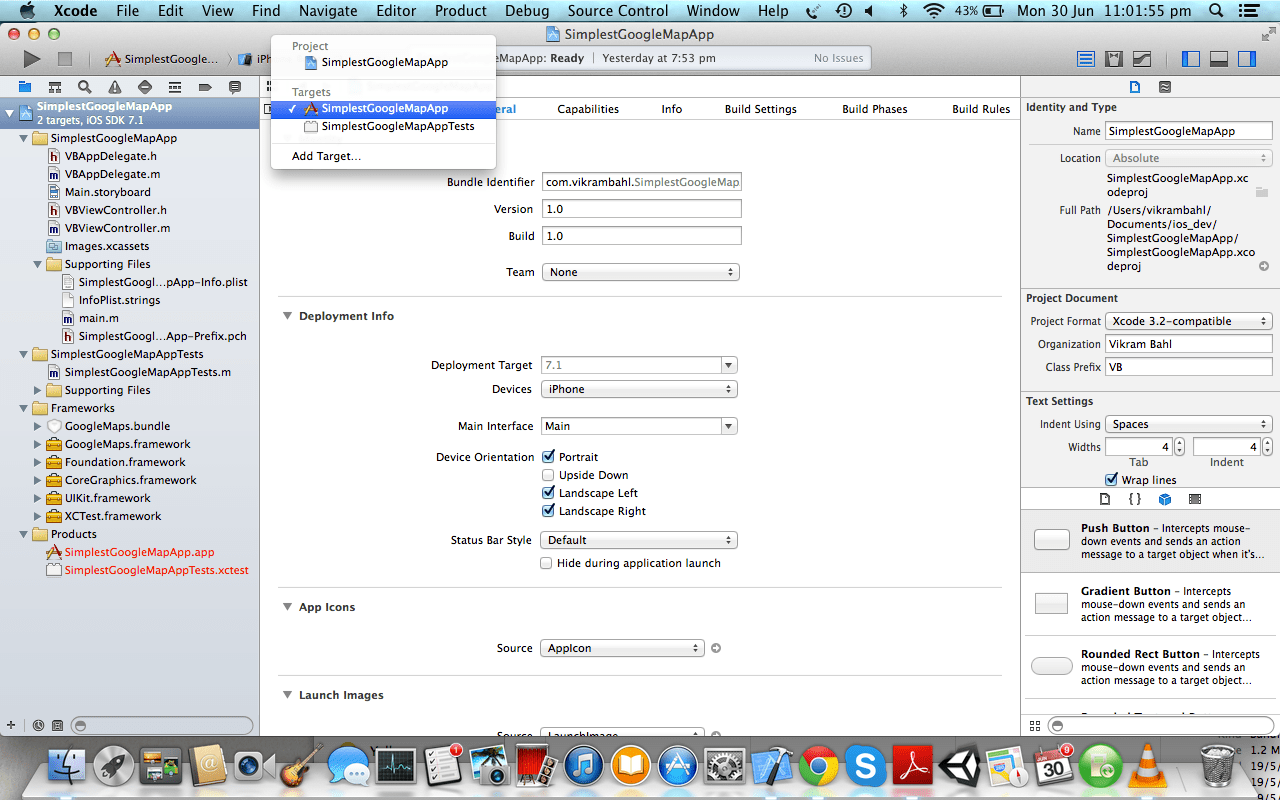
f) Then, select your project from the Project Navigator and select your applications “Target” (not the “Project”).
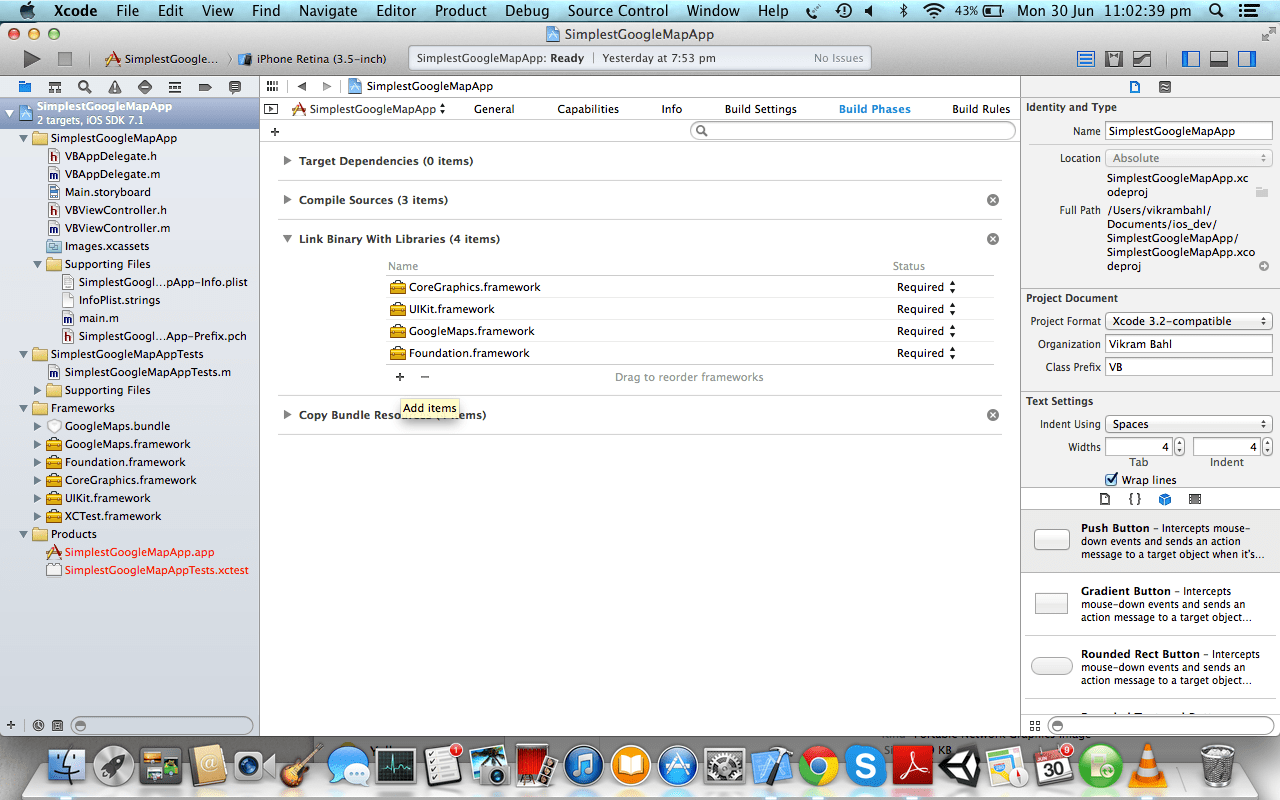
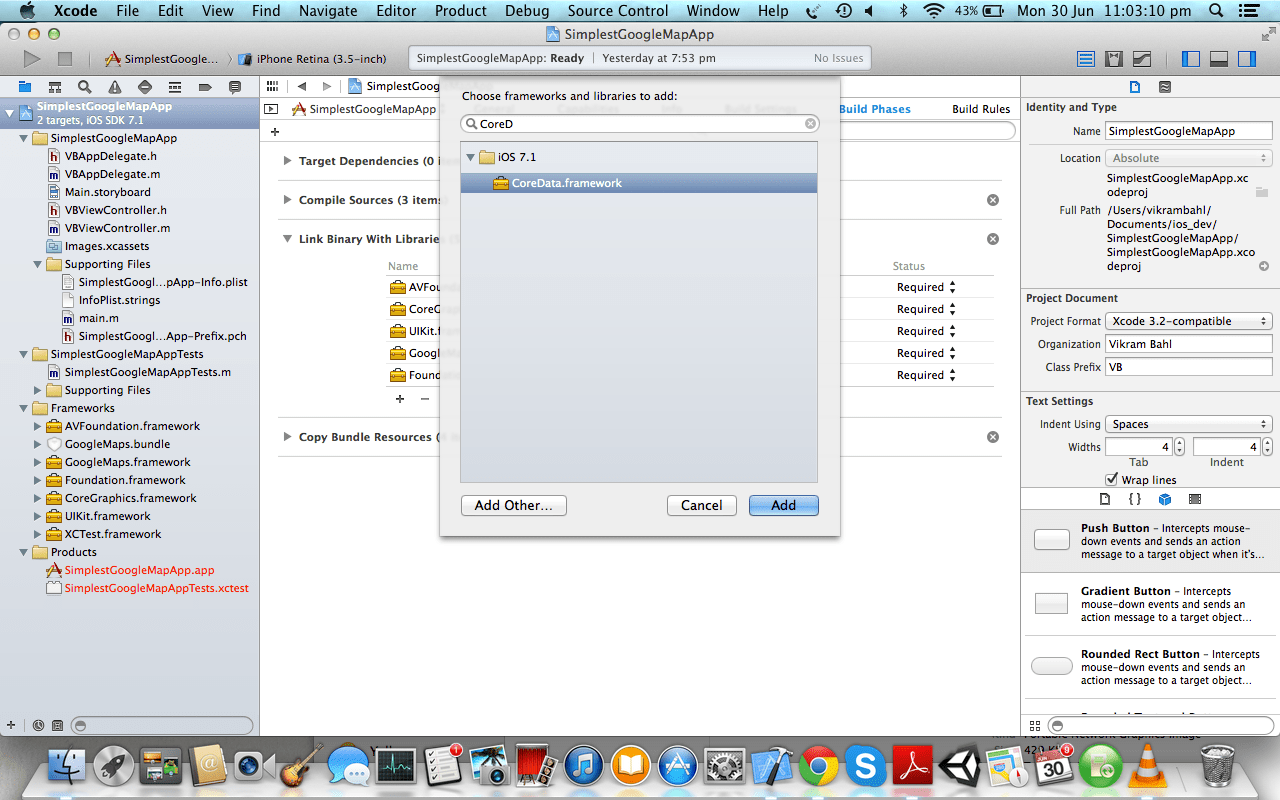
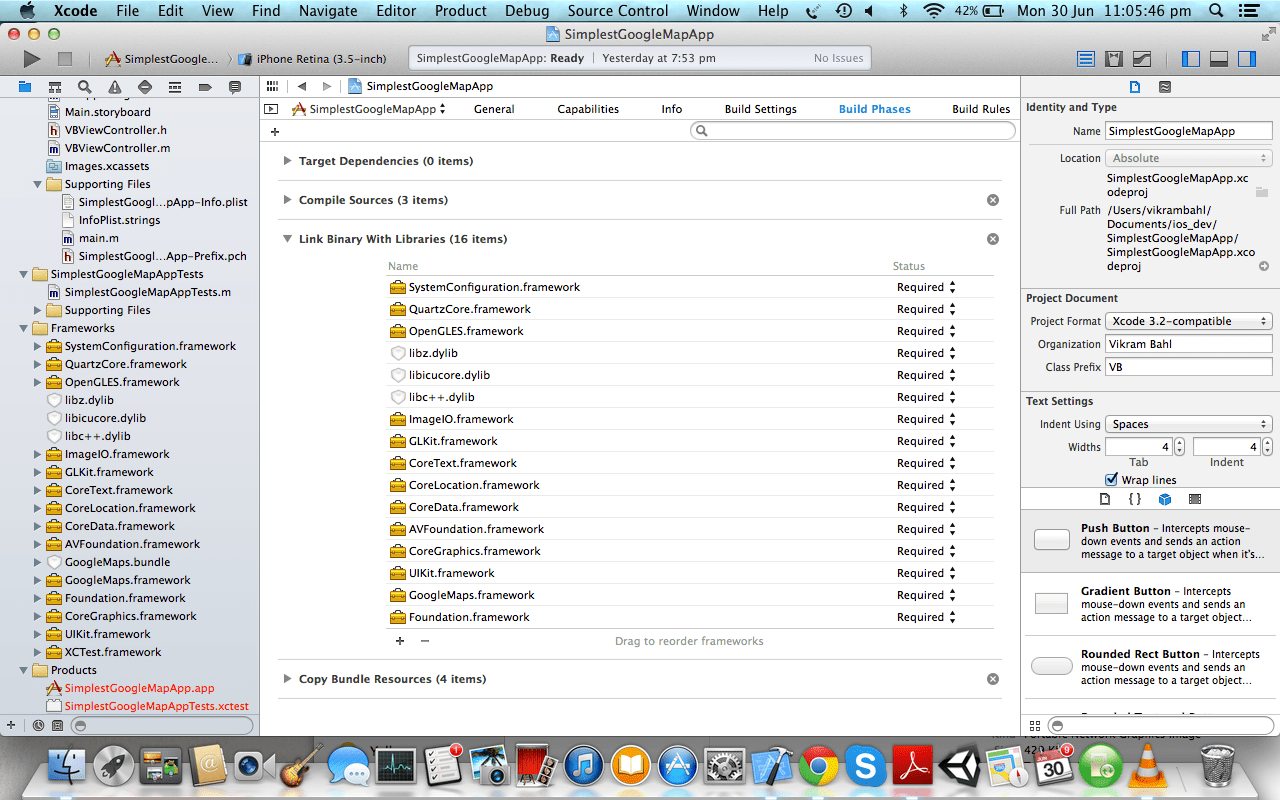
g) Then go to the “Build Phases” tab and then open “Link Binary With Libraries”. Then click on the “+” button at the bottom left and add the following libraries to be compiled along with your app binaries:
- AVFoundation.framework
- CoreData.framework
- CoreLocation.framework
- CoreText.framework
- GLKit.framework
- ImageIO.framework
- libc++.dylib
- libicucore.dylib
- libz.dylib
- OpenGLES.framework
- QuartzCore.framework
- SystemConfiguration.framework
This is what your Xcode environment should look like:
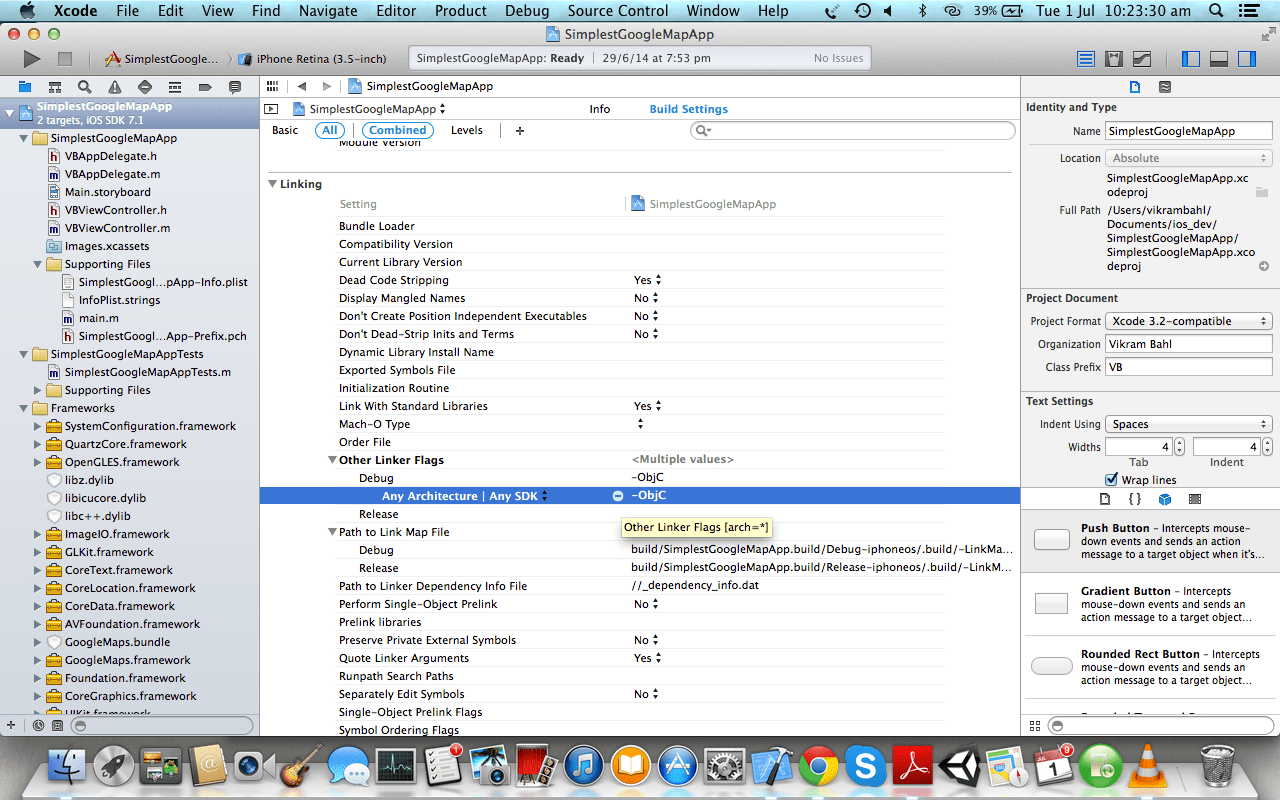
h) Now choose your “Project” rather than a “Target” and open the “Build Settings” tab. Scroll down till you find the “Linking” section and under that find “Other Linker Flags”. Now open the section and click the “+” next to “Debug” and add “-ObjC” in the text field. If these settings are not visible, change the filter in the “Build Settings” to “All” instead of “Basic”.
Add the ‘-ObjC’ flag in Other Linker Flags under Build Settings tab
- Begin Coding
a) Open your AppDelegate.m file and add the following import statement:
#import <GoogleMaps/GoogleMaps.h>;

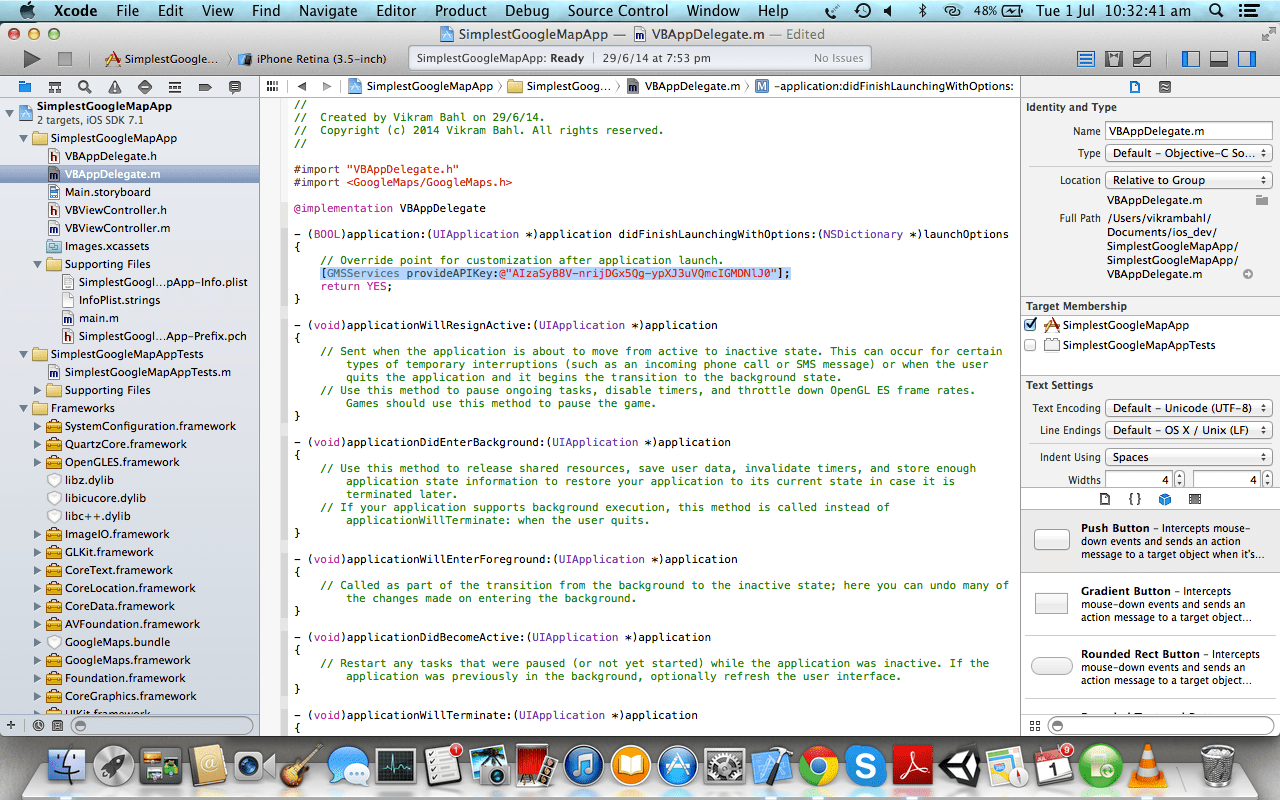
//Copy the API Key you created in Step 2 and enter the following code in the method

application: didFinishLaunchingWithOptions:

[GMSServices provideAPIKey:@"API_KEY"];
Replace API_KEY with your API key.
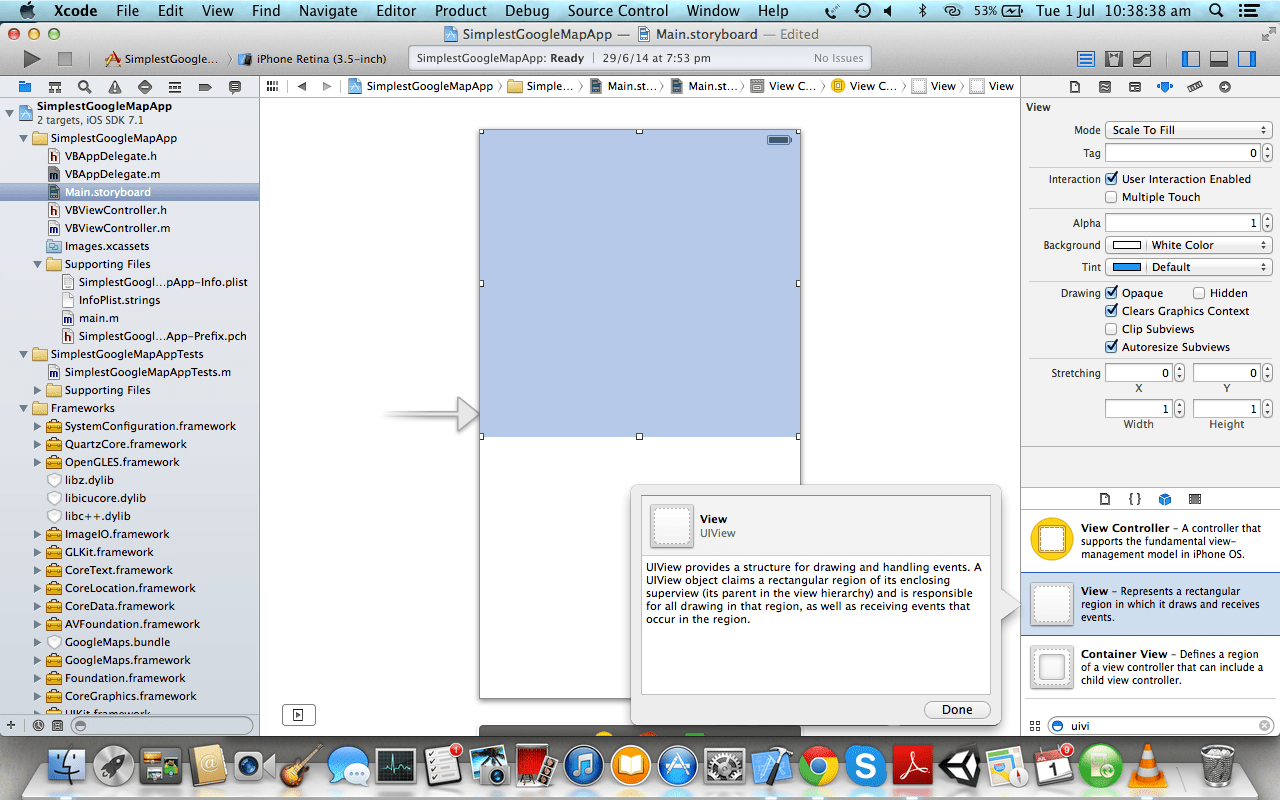
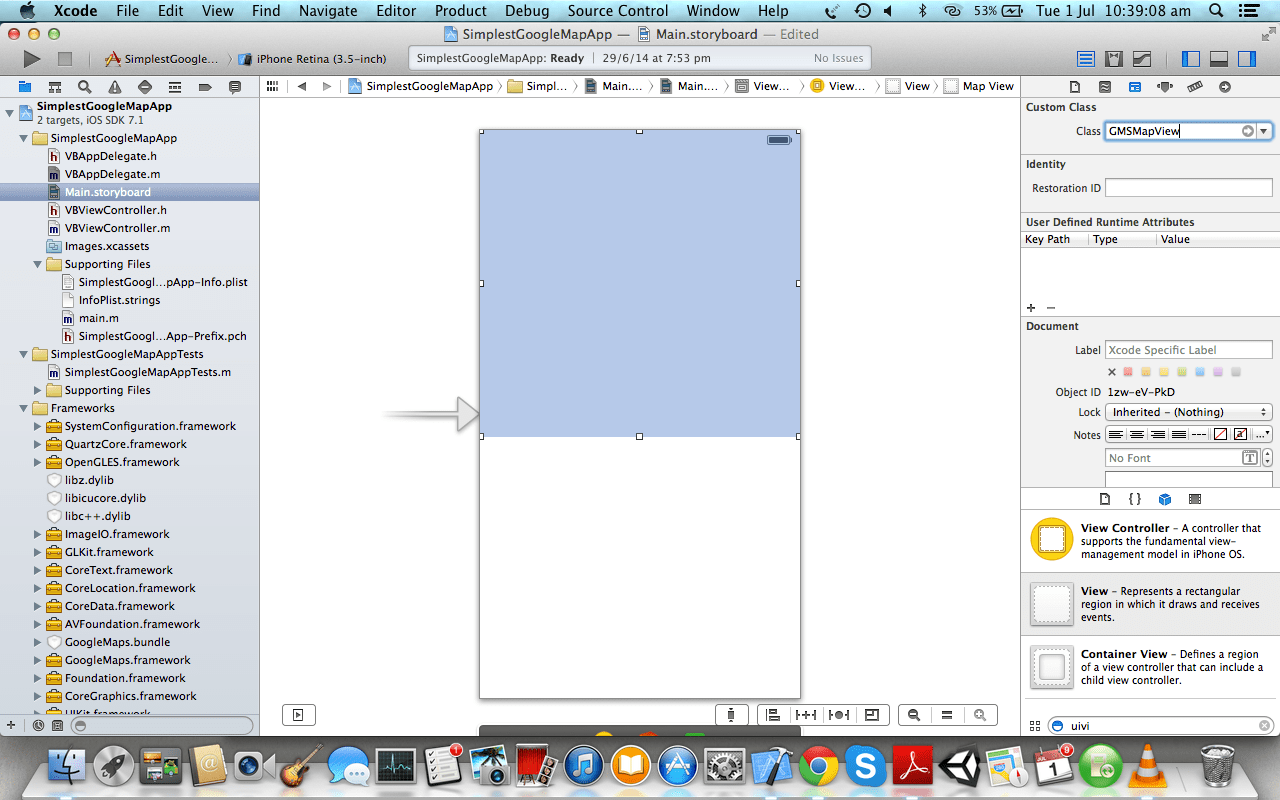
b) Open “Main.Storyboard” and drag a UIView object from the Object Library. Now open the Identity Inspector and under Custom Class add “GMSMapView”.
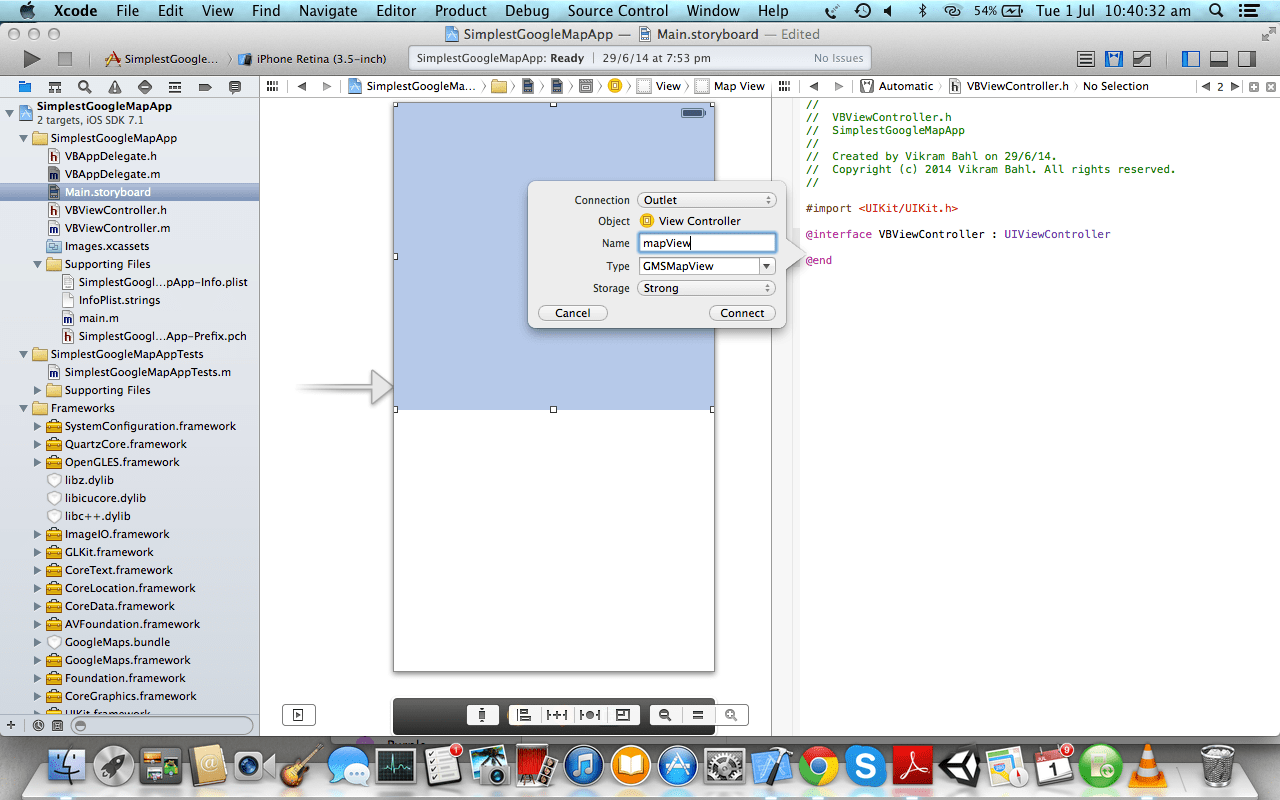
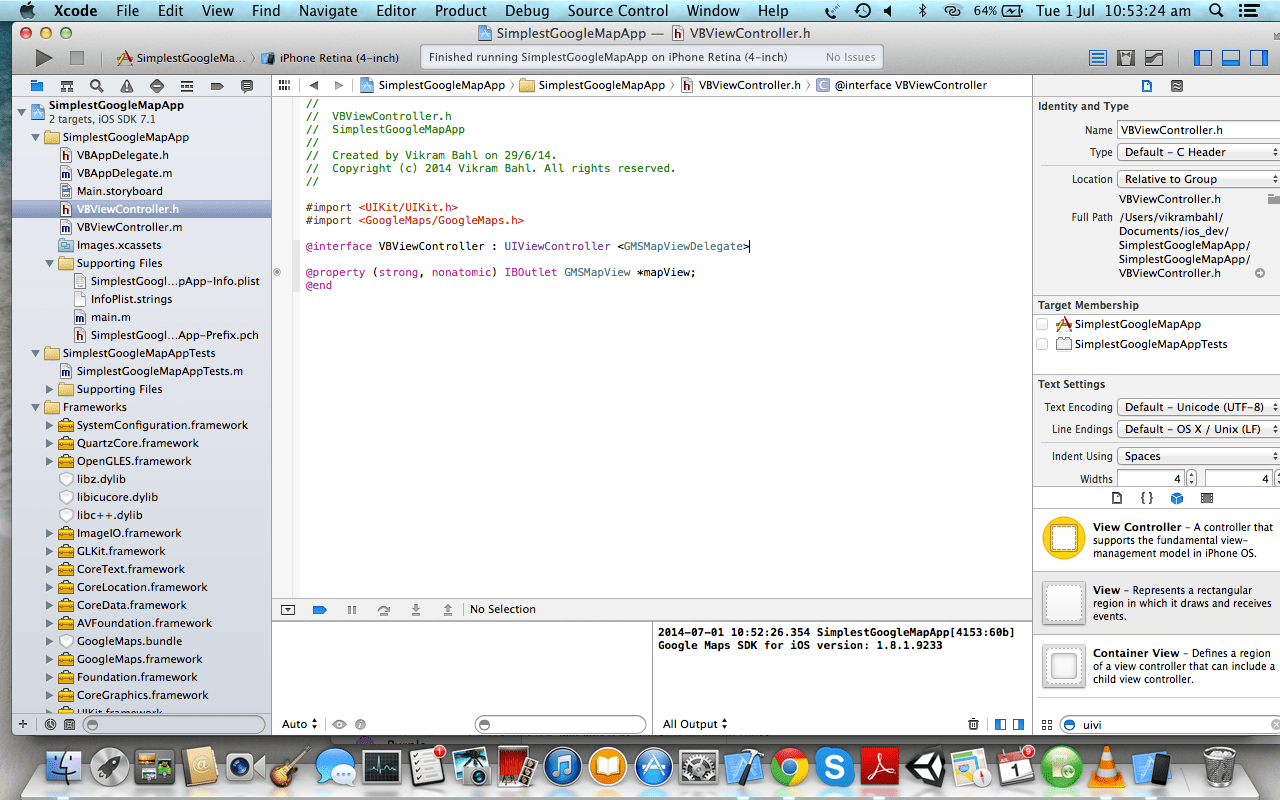
c) Control drag from the UIView (GMSMapView) object to your ViewController.h file to create an outlet with the name “mapView”. Don’t forget to add the GoogleMaps import statement in your ViewController.h file.
d) Make the ViewController conform to the “GMSMapViewDelegate” protocol.
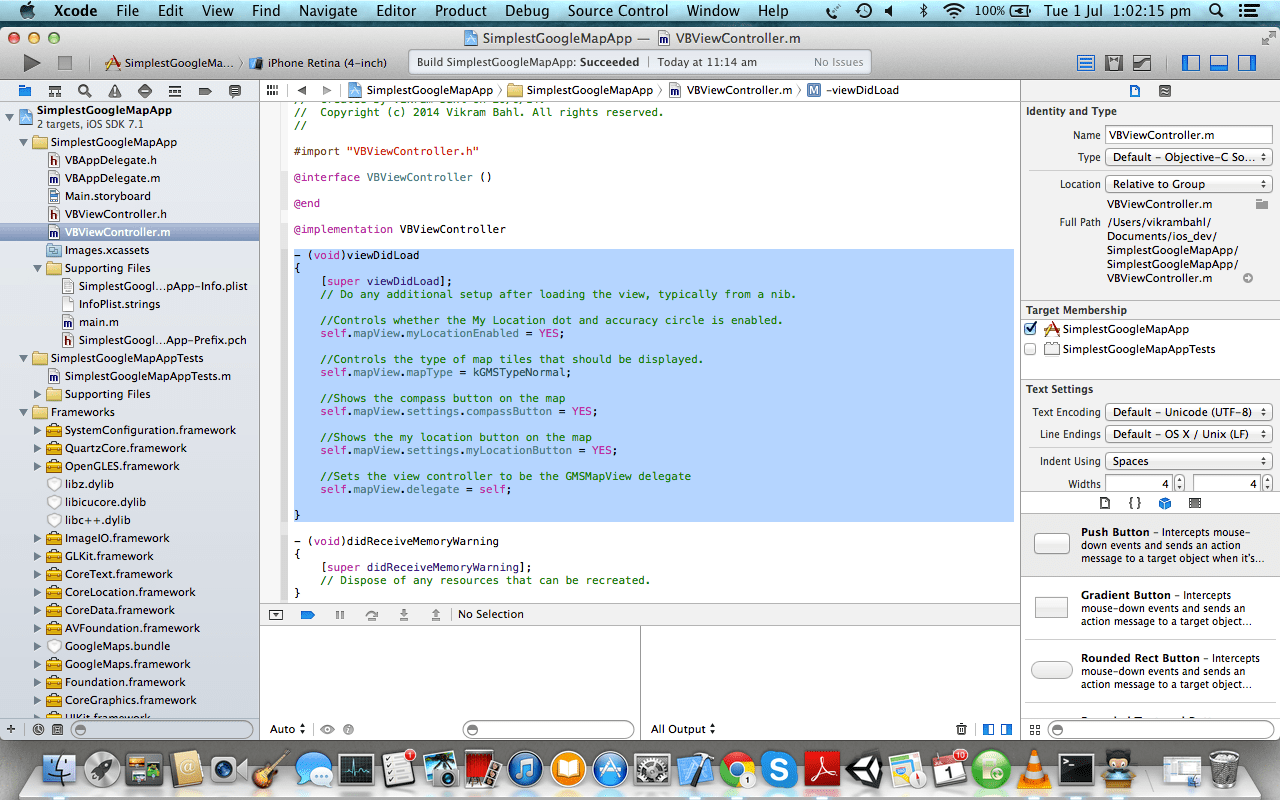
e) Finally, add the following code to your ViewController.m file in the viewDidLoad: method
//Controls whether the My Location dot and accuracy circle is enabled.

self.mapView.myLocationEnabled = YES;

//Controls the type of map tiles that should be displayed.

self.mapView.mapType = kGMSTypeNormal;

//Shows the compass button on the map

self.mapView.settings.compassButton = YES;

//Shows the my location button on the map

self.mapView.settings.myLocationButton = YES;

//Sets the view controller to be the GMSMapView delegate

self.mapView.delegate = self;
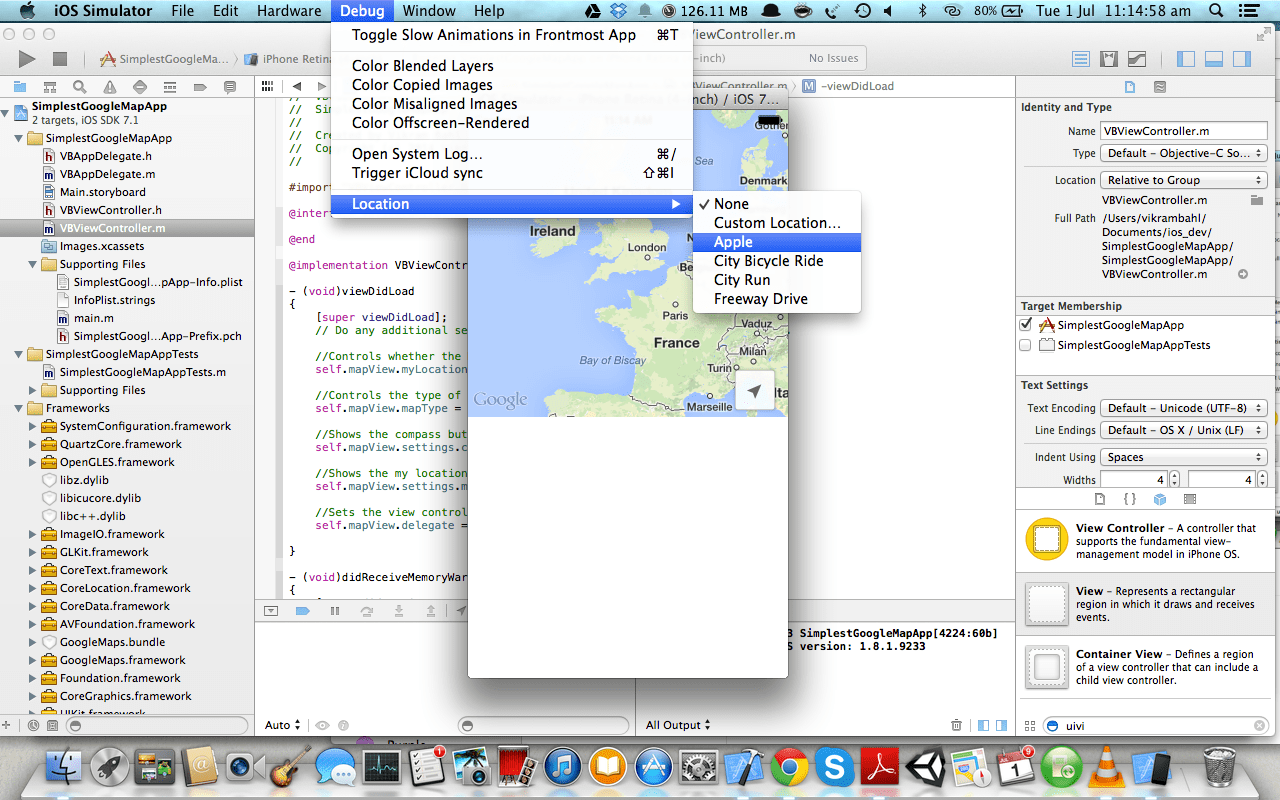
f) Now run the app in the simulator. Choose a location from the Debug -> Location menu option. Click on the my location button the app to move to your current location. And done!
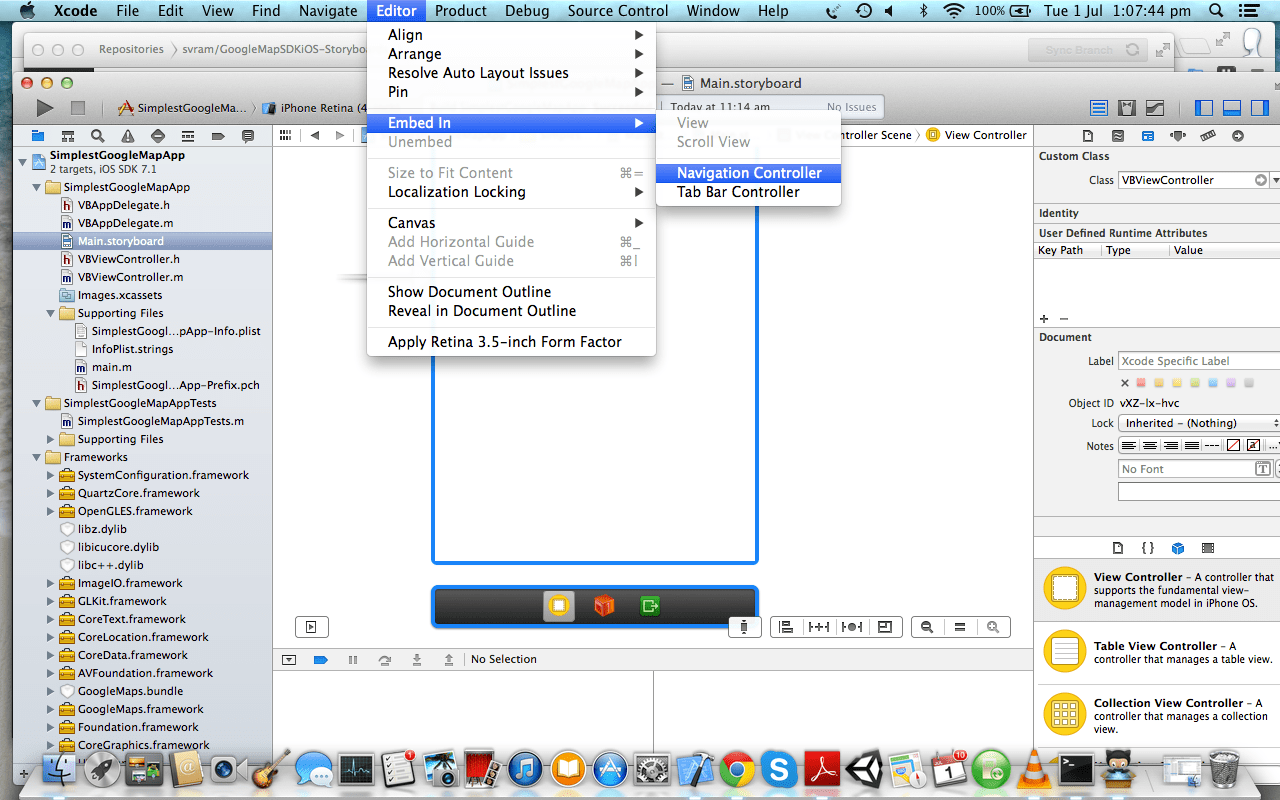
g) Almost done. Finally some cosmetic changes. Go to your main storyboard and click on the view controller. Now go to the menu add a navigation controller by choosing “Editor -> Embed In -> Navigation Controller”.
This will add a navigator controller to your main storyboard.
Next give the navigation bar a title by adding the following code in your ViewController.m file:
self.title = @"Google Maps in iOS";
Feel free to add any other UIView objects. I have added a dummy button and a UITextView object.
Get the project files on Github.
comments powered by Disqus